Table of Contents
Taking Measurements with SOLYX Go
Pair a SOLYX Go with the SOLYX Go app, select a surface, and record GPS-tagged soil moisture, temperature, and EC readings.
Table of Contents
Pair your SOLYX Go with the SOLYX Go app, choose a surface, and record GPS-tagged soil moisture, temperature, and salinity (EC) readings that are saved to your ZENTRA Cloud organization.
Overview
The SOLYX Go takes the measurement, and the SOLYX Go app on your phone records it. When you press a button on the SOLYX Go, the sensor measures soil water content, temperature, and electrical conductivity (EC), and the app tags that reading with a timestamp and your phone's GPS location. The app shows these values as Moisture, Temperature, and Salinity.
Readings are collected as a soil test on a surface. A surface is the field, green, plot, or site you're measuring, and a soil test is one visit to it: you select the surface, walk the site taking readings at each location, then complete the test. Because each surface keeps its own history, you can compare today's readings with earlier visits to the same site.
There's no registration step. Your SOLYX Go is added to your organization automatically the first time you take a measurement while signed in, and it then appears on the Handhelds tab of the Devices page in ZENTRA Cloud. See Downloading SOLYX Go Data to export your measurements.
SOLYX Go is well suited for:
- Ground-truthing sensor networks
- Verifying irrigation effectiveness
- Conducting field surveys and research studies
- Collecting supplemental data between fixed monitoring points
Before You Start
Make sure you have the following:
- A ZENTRA Cloud 2.0 account with an organization. If you don't have one yet, see Logging In and Setting Up an Organization. You can enter your SOLYX Go serial number when prompted during organization creation.
- The SOLYX Go app installed on your phone. Download it from the App Store (iOS) or Google Play (Android).
- A charged SOLYX Go. Press the power button. The battery light should illuminate and the Bluetooth light should blink. If neither light comes on, charge the SOLYX Go before continuing.
Your first year of service is included. Your subscription starts automatically with the first measurement your SOLYX Go uploads to ZENTRA Cloud, so the clock doesn't start until you take your first reading. Test readings taken while signed in to your organization count as that first measurement.
Try it before you go to the field. Take a few test readings at your desk or just outside to confirm the SOLYX Go and app are working together before you head out to a site.
The SOLYX Go Control Panel
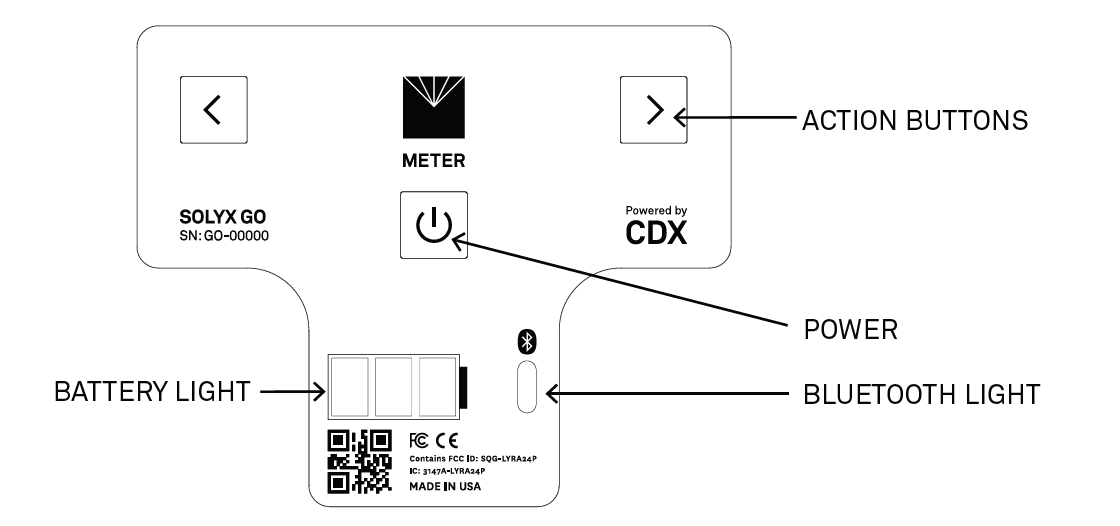
The control panel at the top of the SOLYX Go has four features you'll use:
- Power button — Press to turn the SOLYX Go on. Press and hold to turn it off.
- Action buttons — The two buttons marked < and >. Pressing either one takes a reading, so use whichever is comfortable for your hand.
- Bluetooth light — Blinks when the SOLYX Go is ready to pair, and stays solid once it's connected to the app.
- Battery light — Shows the charge level. The app also shows battery level while you're taking a test.
The serial number is printed on the control panel below the SOLYX GO name.
Taking a Measurement
Sign In and Select Your Organization
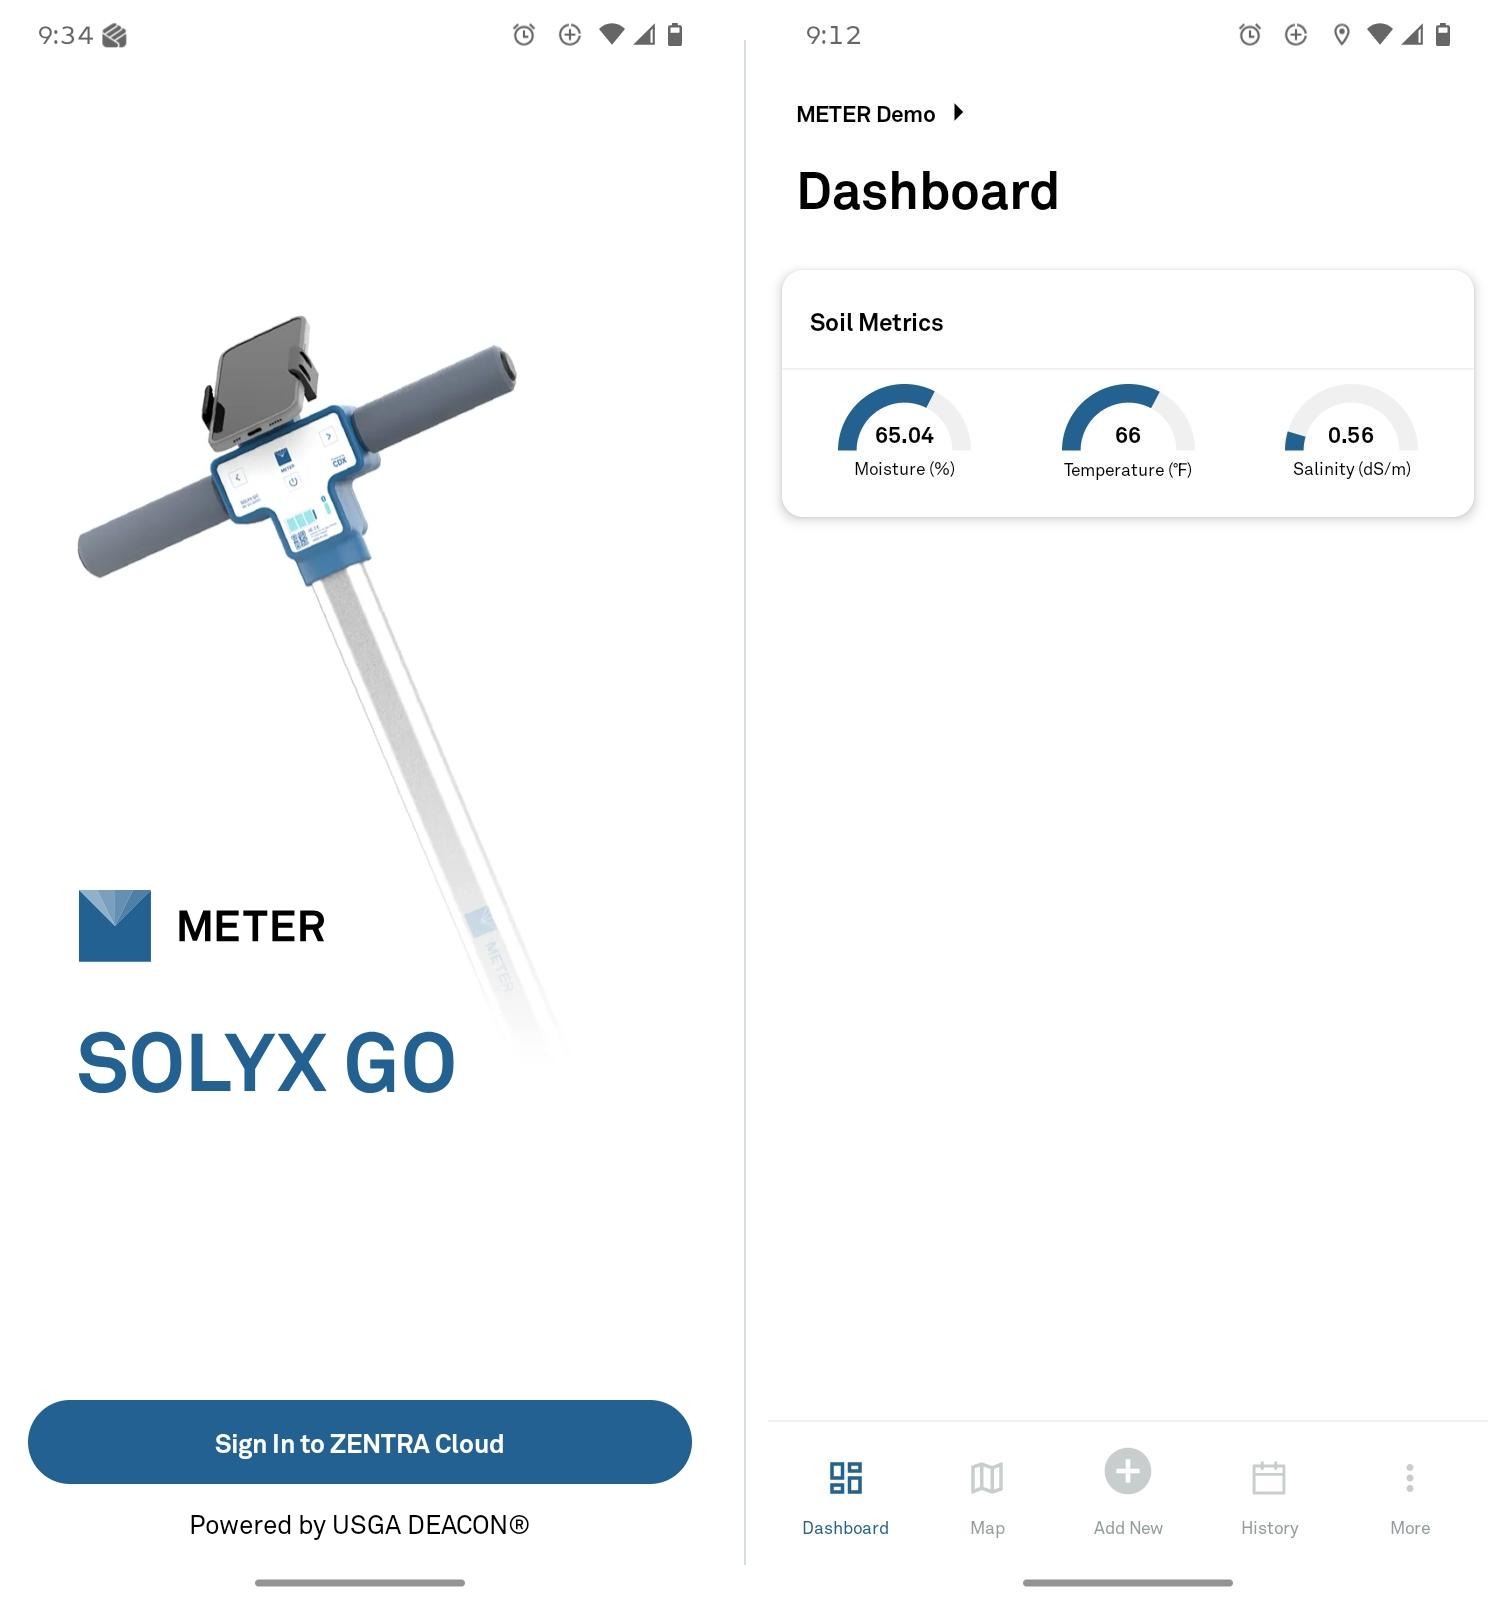
Open the SOLYX Go app and tap Sign In to ZENTRA Cloud. On the sign-in page, enter the Email address and Password for your ZENTRA Cloud account, then tap Sign in. If you've forgotten your password, tap Forgot your password?
After you sign in, the Dashboard opens. The organization picker at the top shows which organization is selected. Readings are saved to that organization, so check it before you start. To switch, tap the organization name and choose another organization.
The app's bottom navigation has five tabs: Dashboard, Map, Add New, History, and More.
Connect to Your SOLYX Go
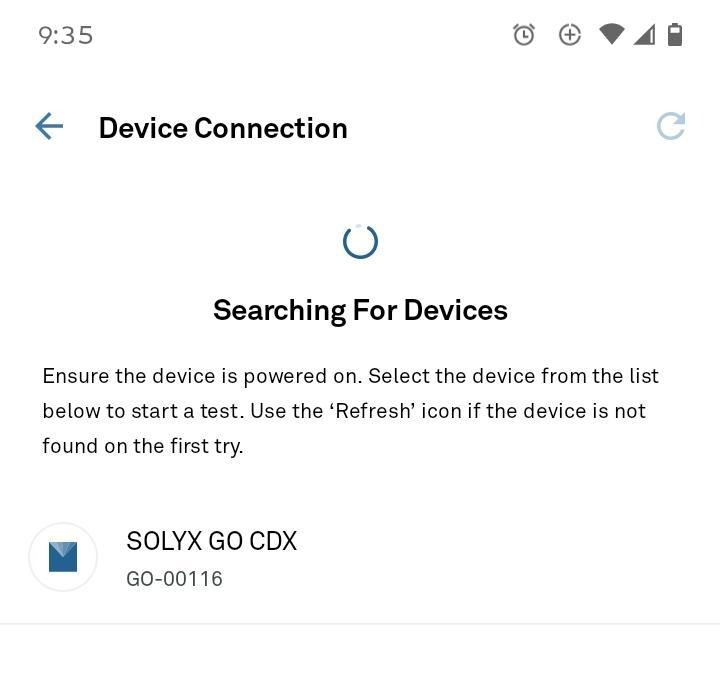
With the SOLYX Go turned on, tap Add New in the bottom navigation. The Device Connection screen searches for nearby devices and lists each one by name and serial number. Tap yours to connect.
If your SOLYX Go doesn't appear, tap the Refresh icon in the upper right.
Once connected, the Bluetooth light on the SOLYX Go stops blinking and stays solid.
The name shown is your SOLYX Go's display name. You can change it under More › Equipment.
Select a Surface
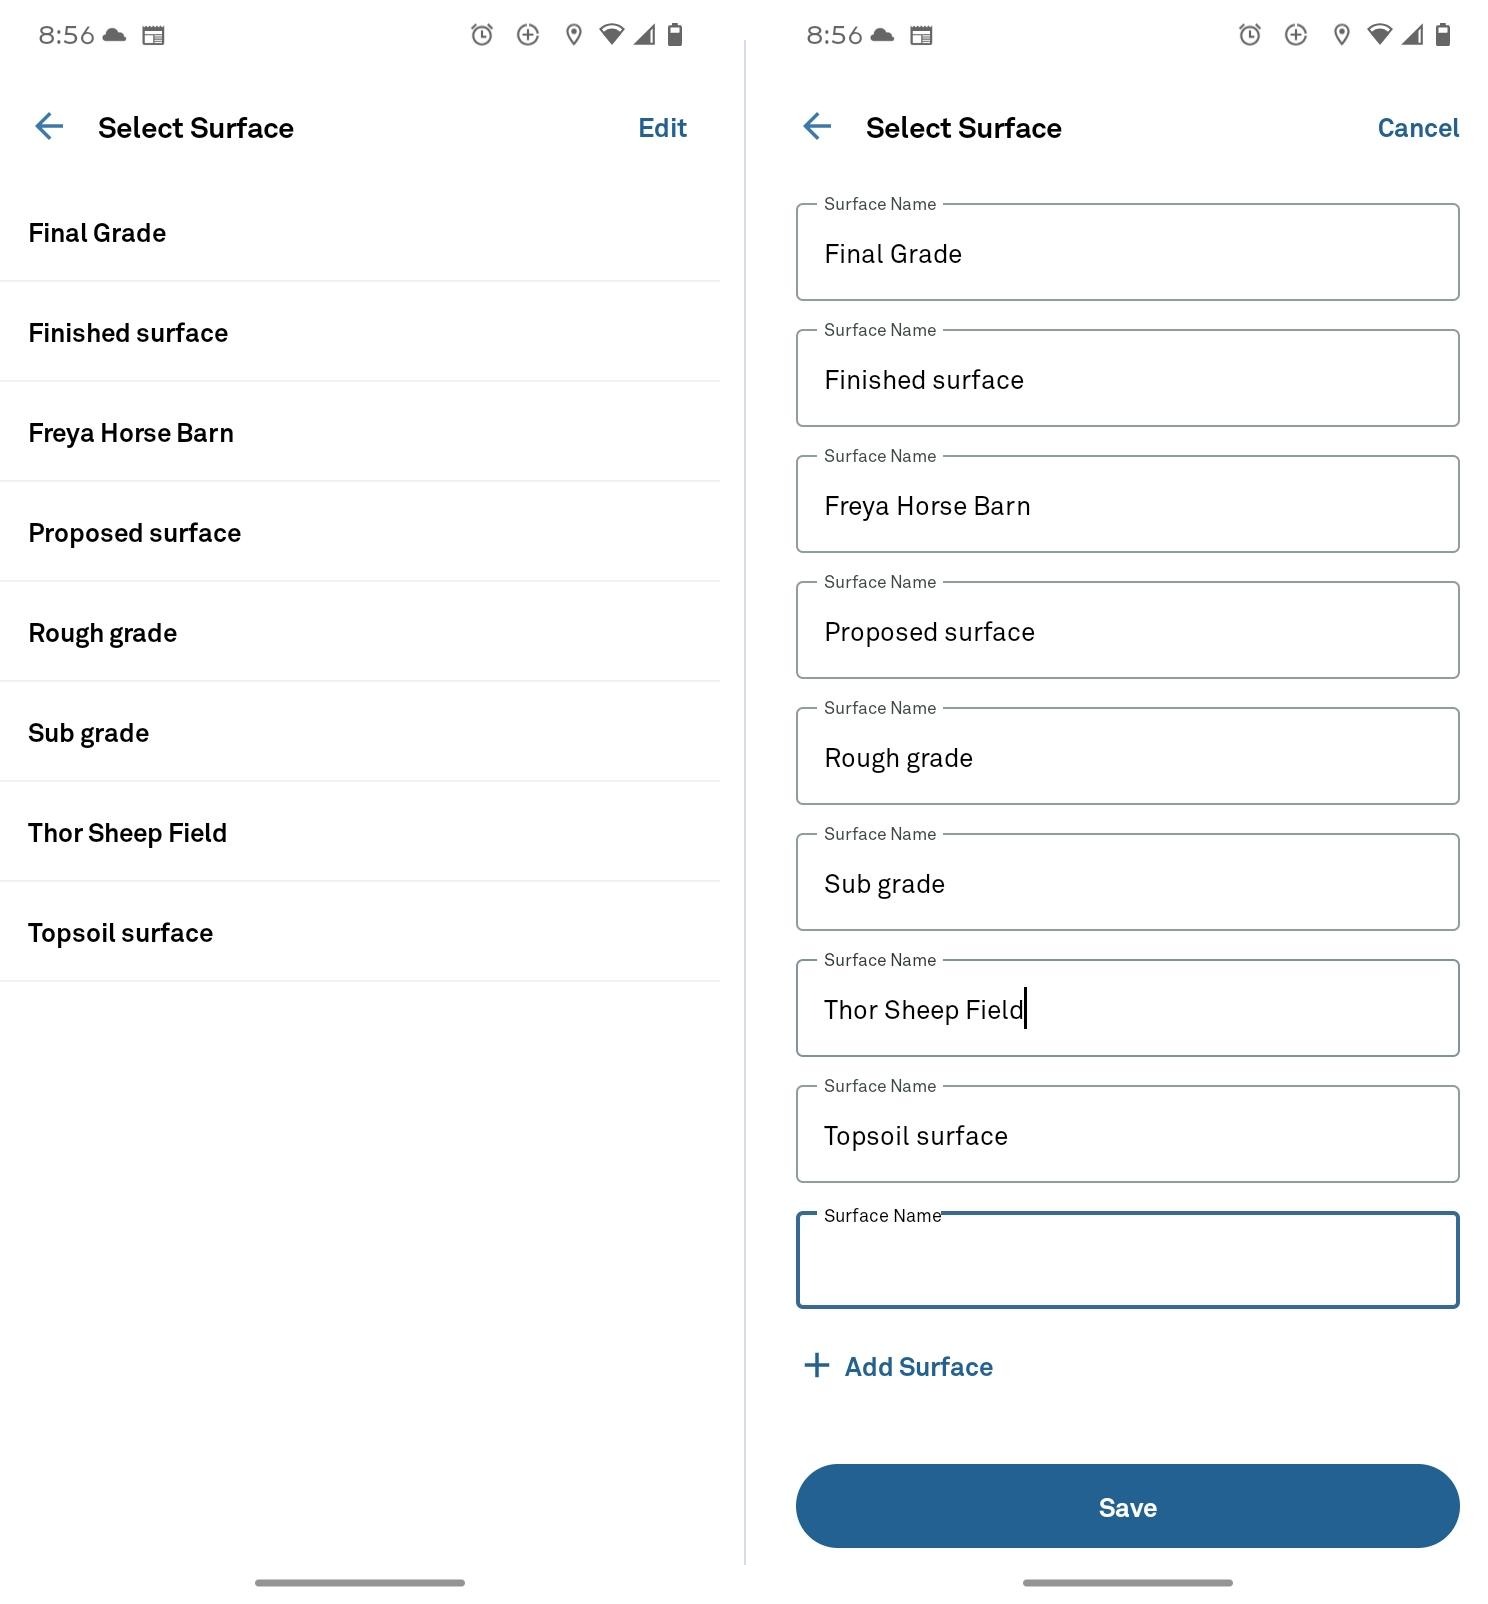
The Select Surface screen lists your surfaces. Tap the surface you're measuring.
To add a new surface:
- Tap Edit.
- Tap Add Surface.
- Enter a Surface Name.
- Tap Save.
Confirm Your Location
The Soil Test screen opens with the Set Testing Area panel. Make sure the blue marker on the map matches where you're standing. The panel also shows the surface you selected and the SOLYX Go's battery level.
The button at the bottom reads Waiting For Measurement until you take your first reading.
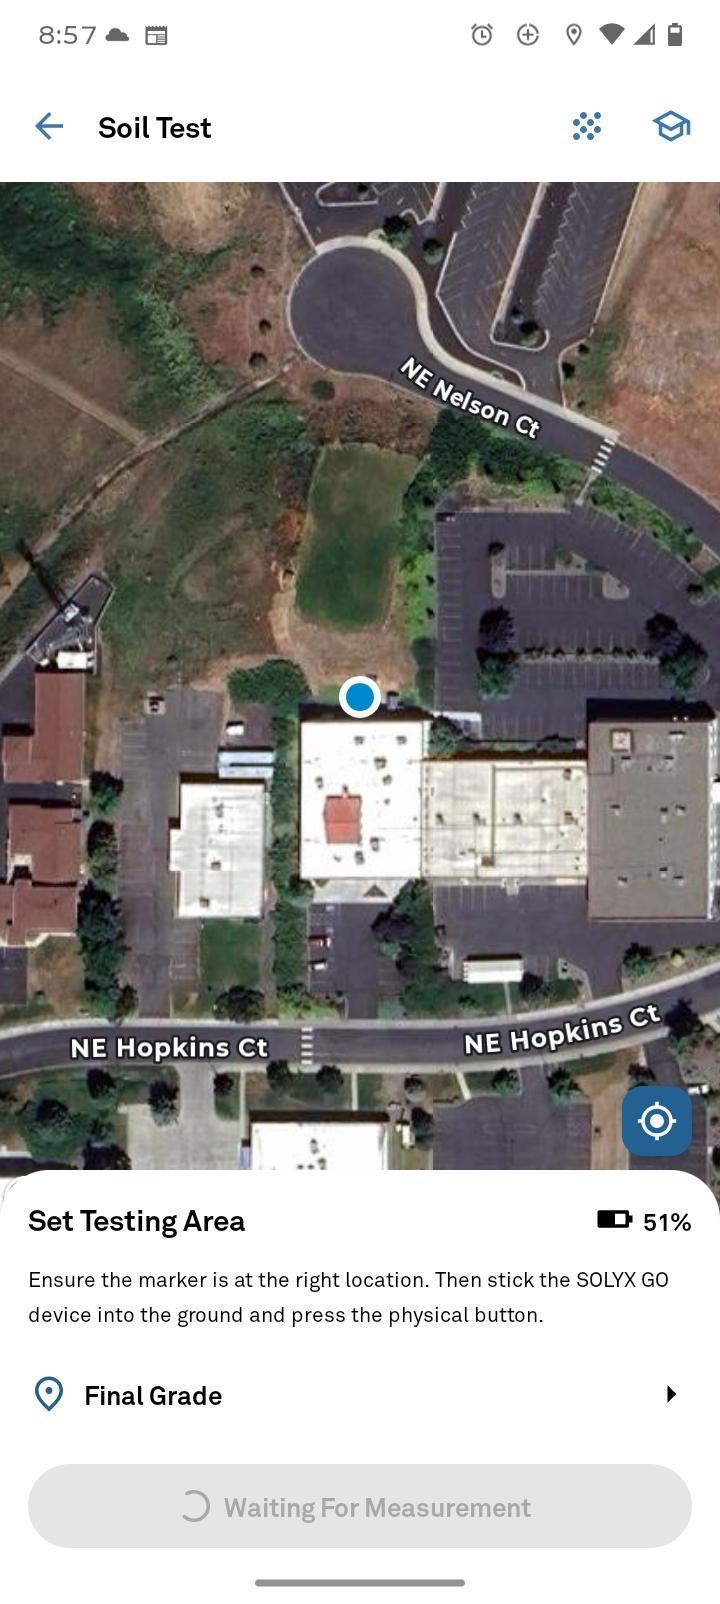
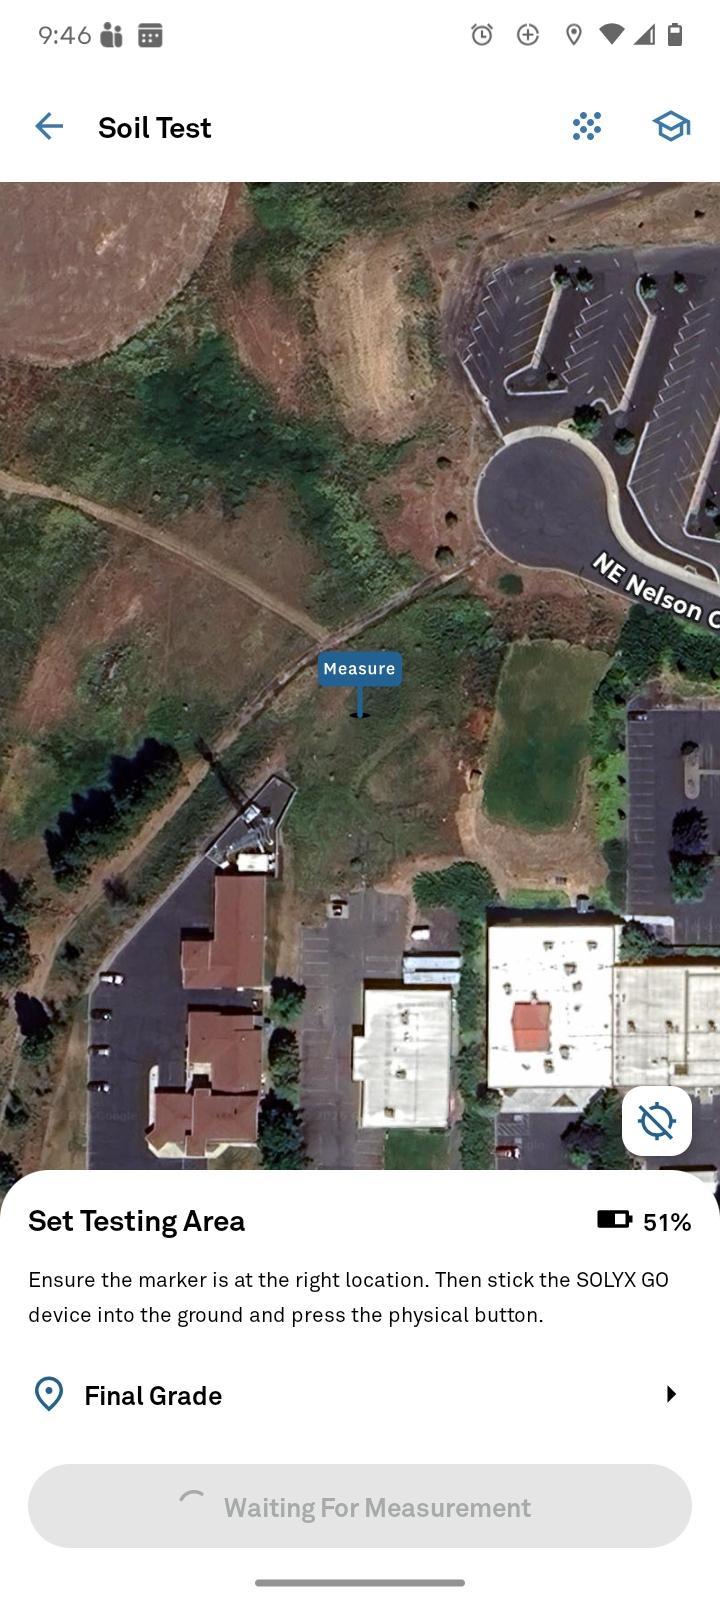
Marker in the wrong place? If the GPS position isn't accurate, tap the blue button in the bottom right corner of the map to turn GPS tracking off. A Measure pin appears in the center of the map. Drag the map until the pin sits over the spot you're measuring, then take your reading. Tap the button again to turn GPS tracking back on. Restarting your phone may also help.
Take Readings
- Walk to the first location you want to measure.
- Insert the SOLYX Go needles fully into the soil.
- Press either action button on the control panel.
- Move a few steps to the next location and repeat.
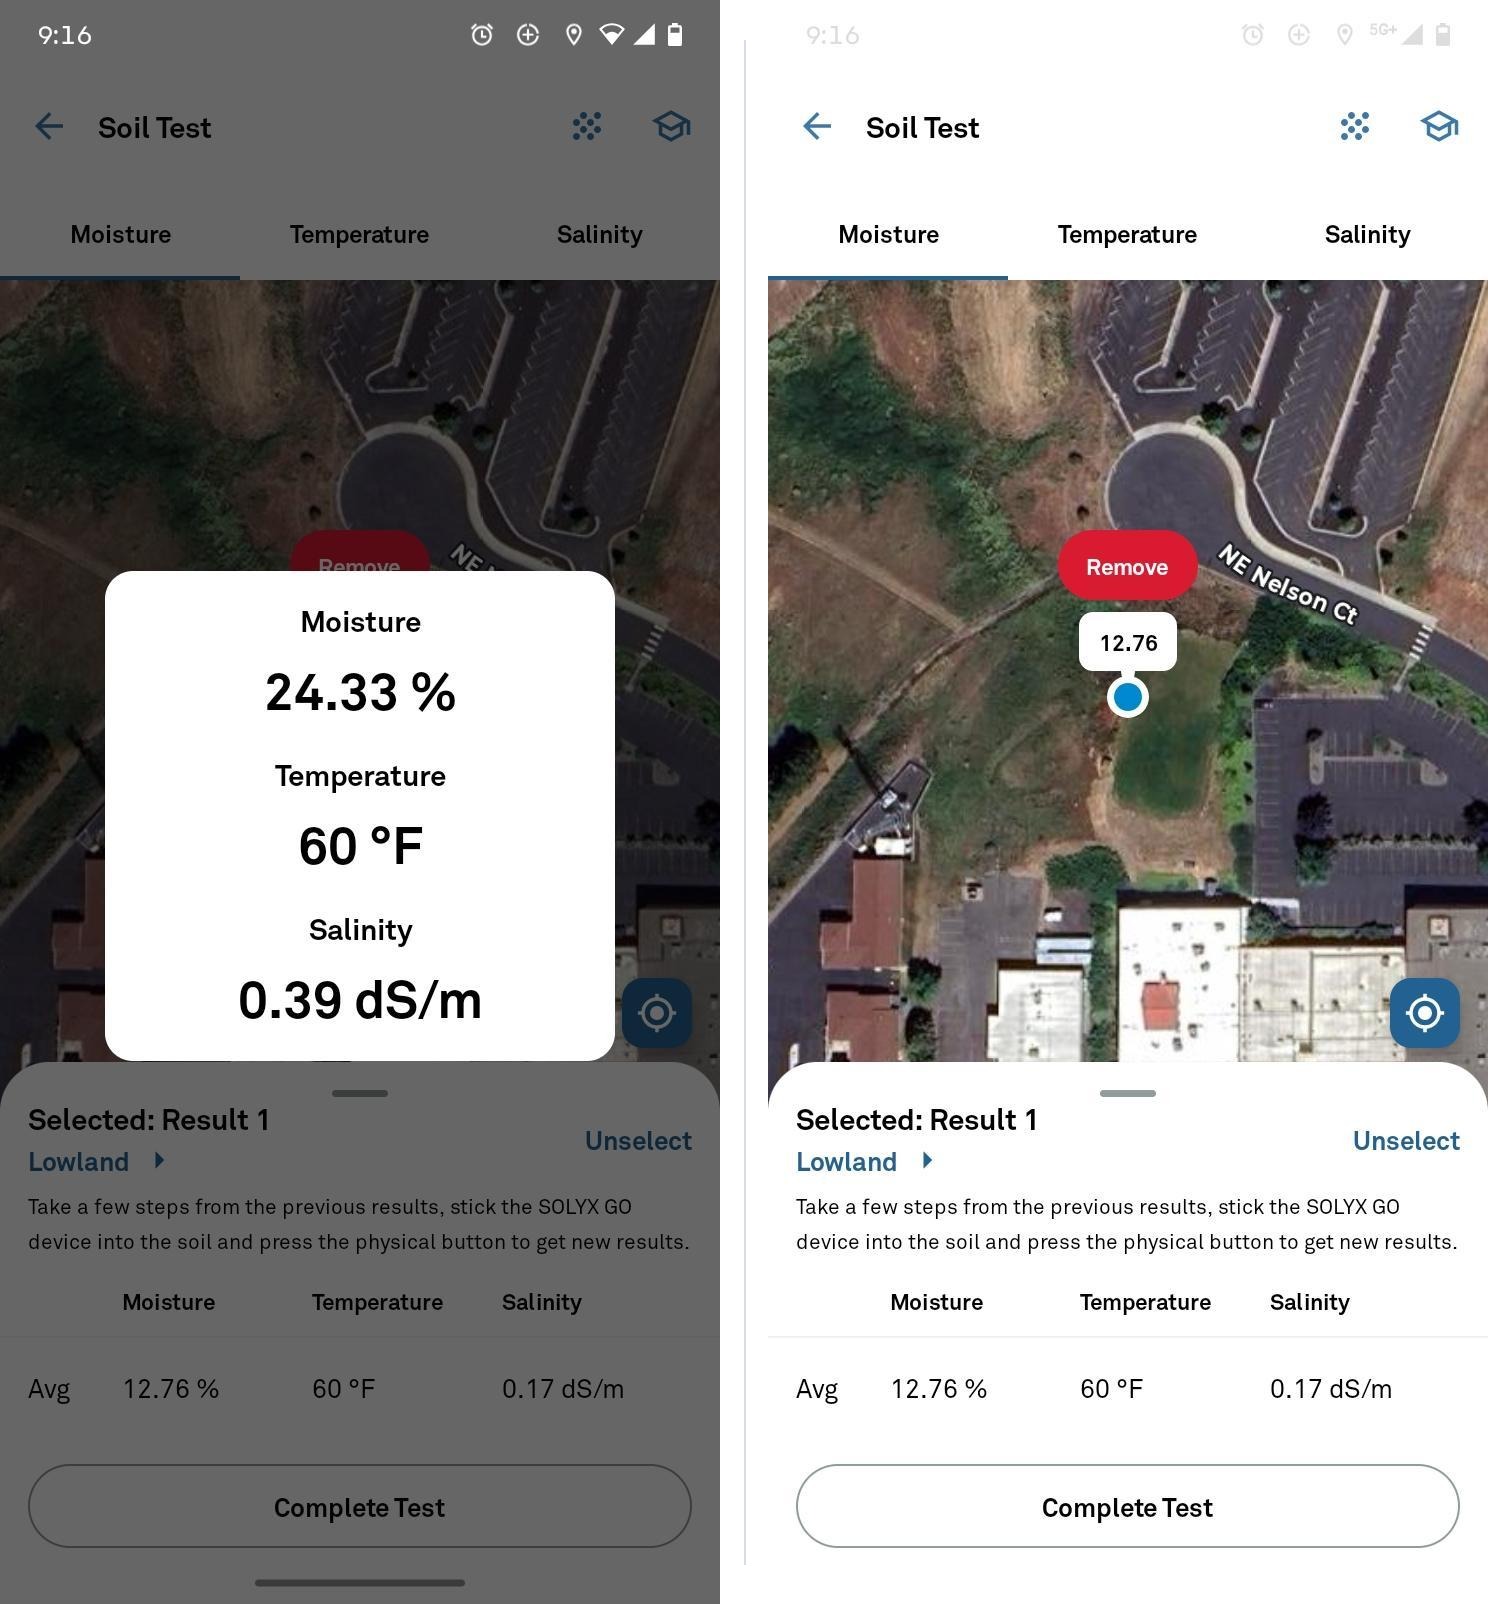
After each reading, the app shows its Moisture (%), Temperature (°F), and Salinity (dS/m). The reading is then added to the map as a marker labeled with its value, and the panel at the bottom shows the selected result along with the test's average (Avg) for each measurement.
Use the Moisture, Temperature, and Salinity tabs at the top of the screen to switch which value the map markers display.
Took a bad reading? Tap its marker on the map, then tap Remove. Tap Unselect to deselect a reading without removing it.
Complete the Test
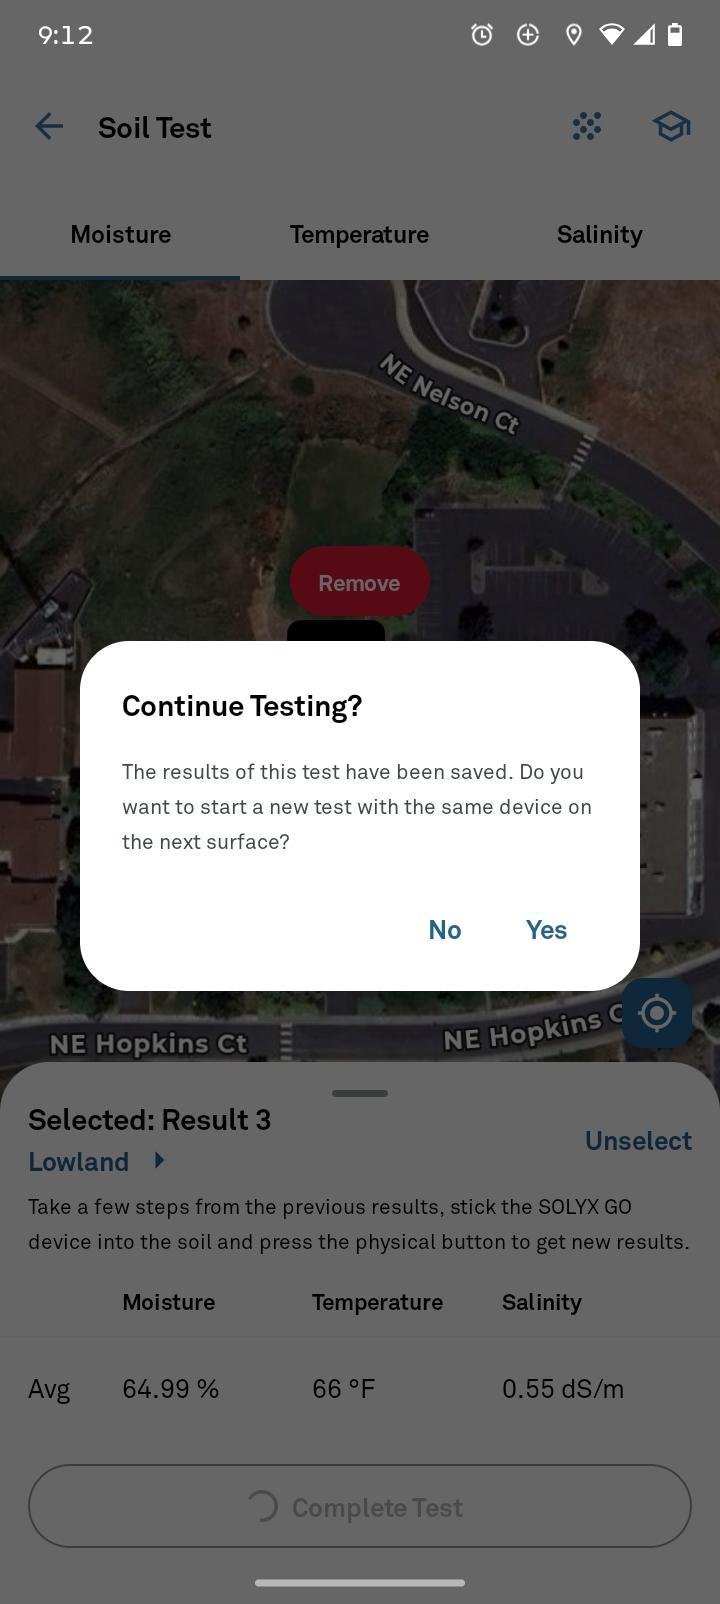
When you've measured every location on the surface, tap Complete Test. The test is saved, and the app asks Continue Testing?
- Tap Yes to start a new test with the same SOLYX Go. The Select Surface screen opens so you can choose the next surface.
- Tap No if you're finished.
Viewing Past Tests
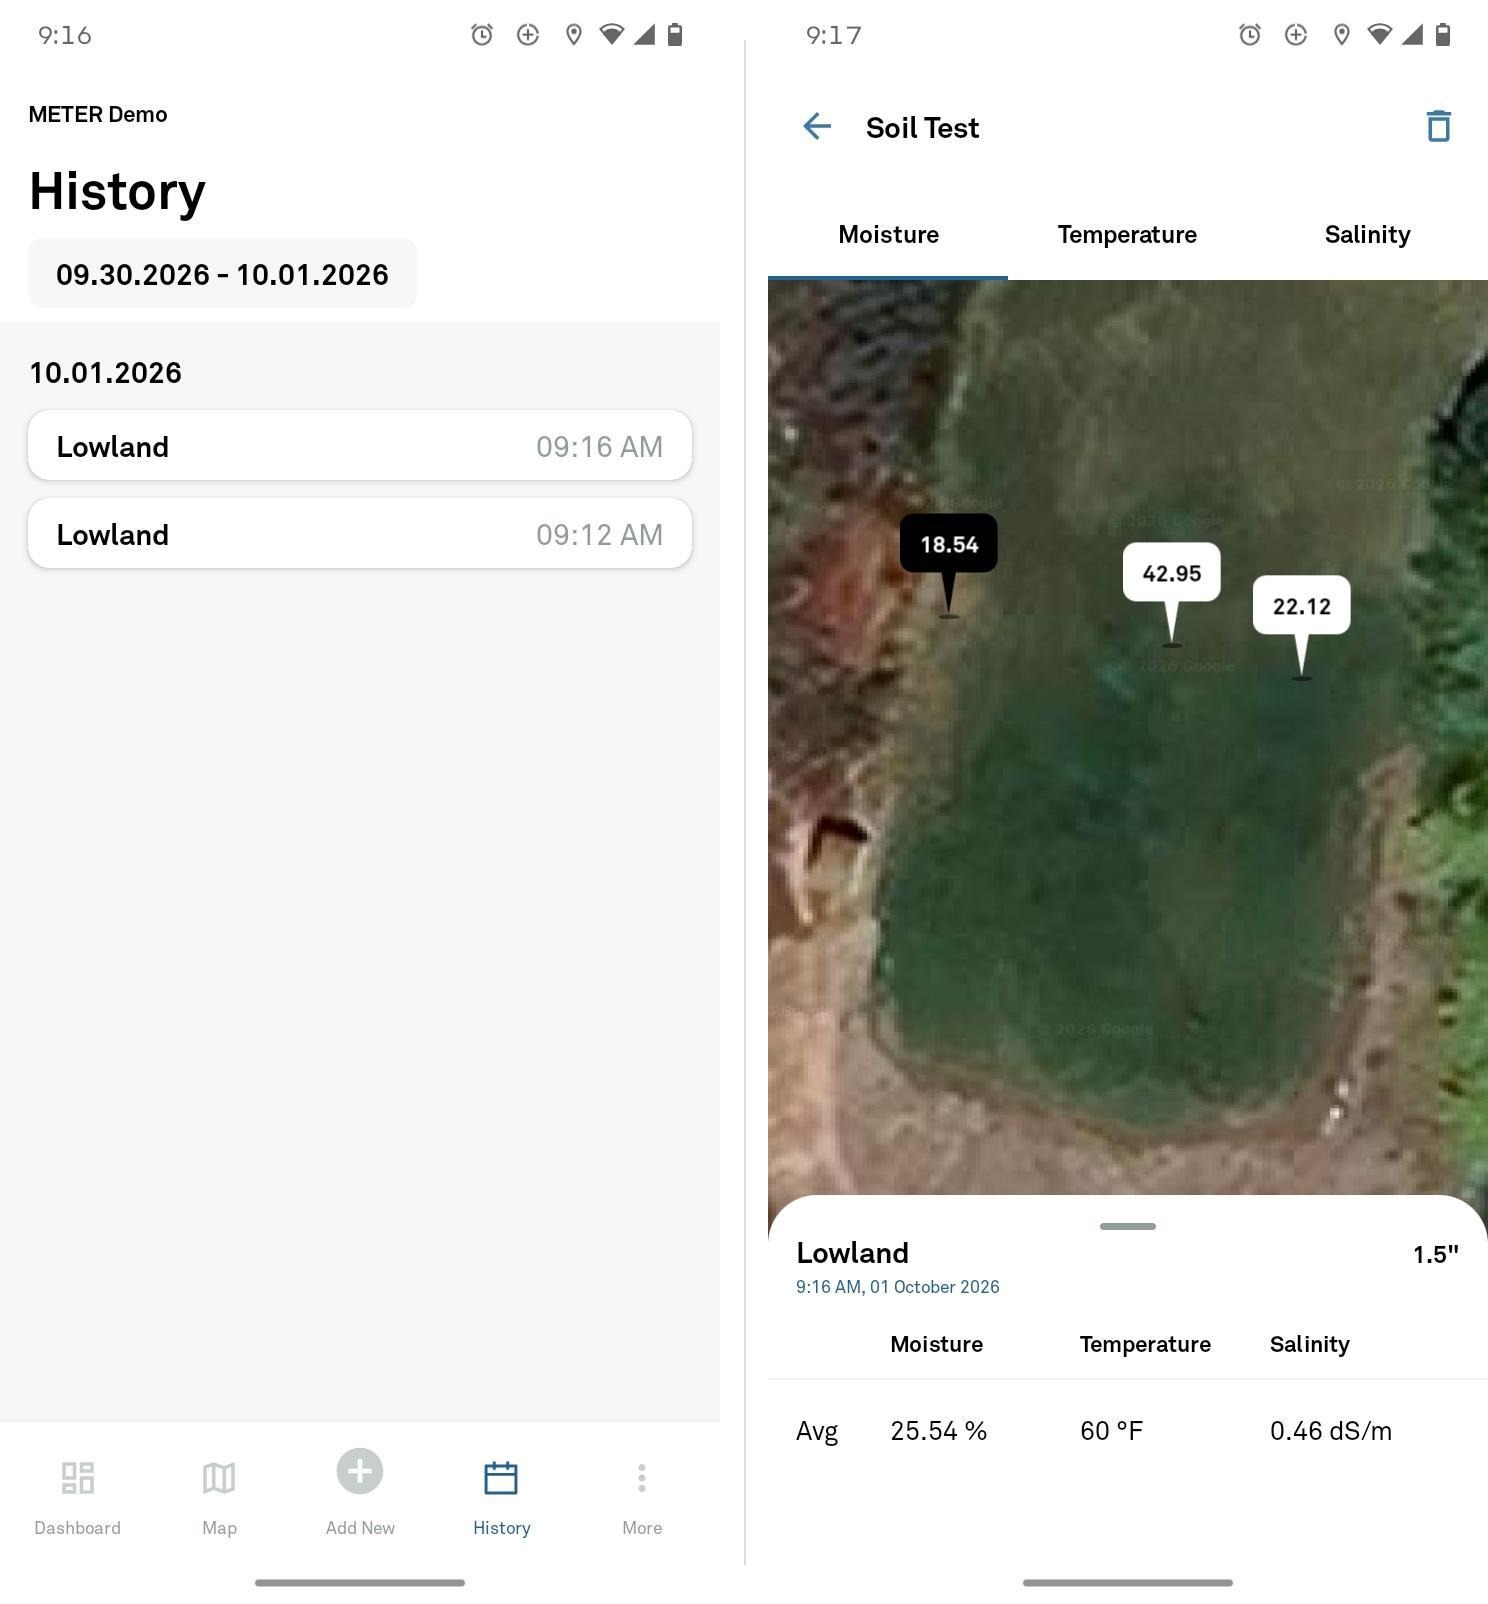
Tap History in the bottom navigation. Tests are grouped by date, and each one is listed by surface name and time. Tap the date range at the top to change which dates are shown.
Tap a test to open it. The map shows each reading from that test, and you can use the Moisture, Temperature, and Salinity tabs to switch the values shown. The panel at the bottom shows the surface, the date and time of the test, the tine size, and the test's averages.
Reviewing Trends on the Dashboard
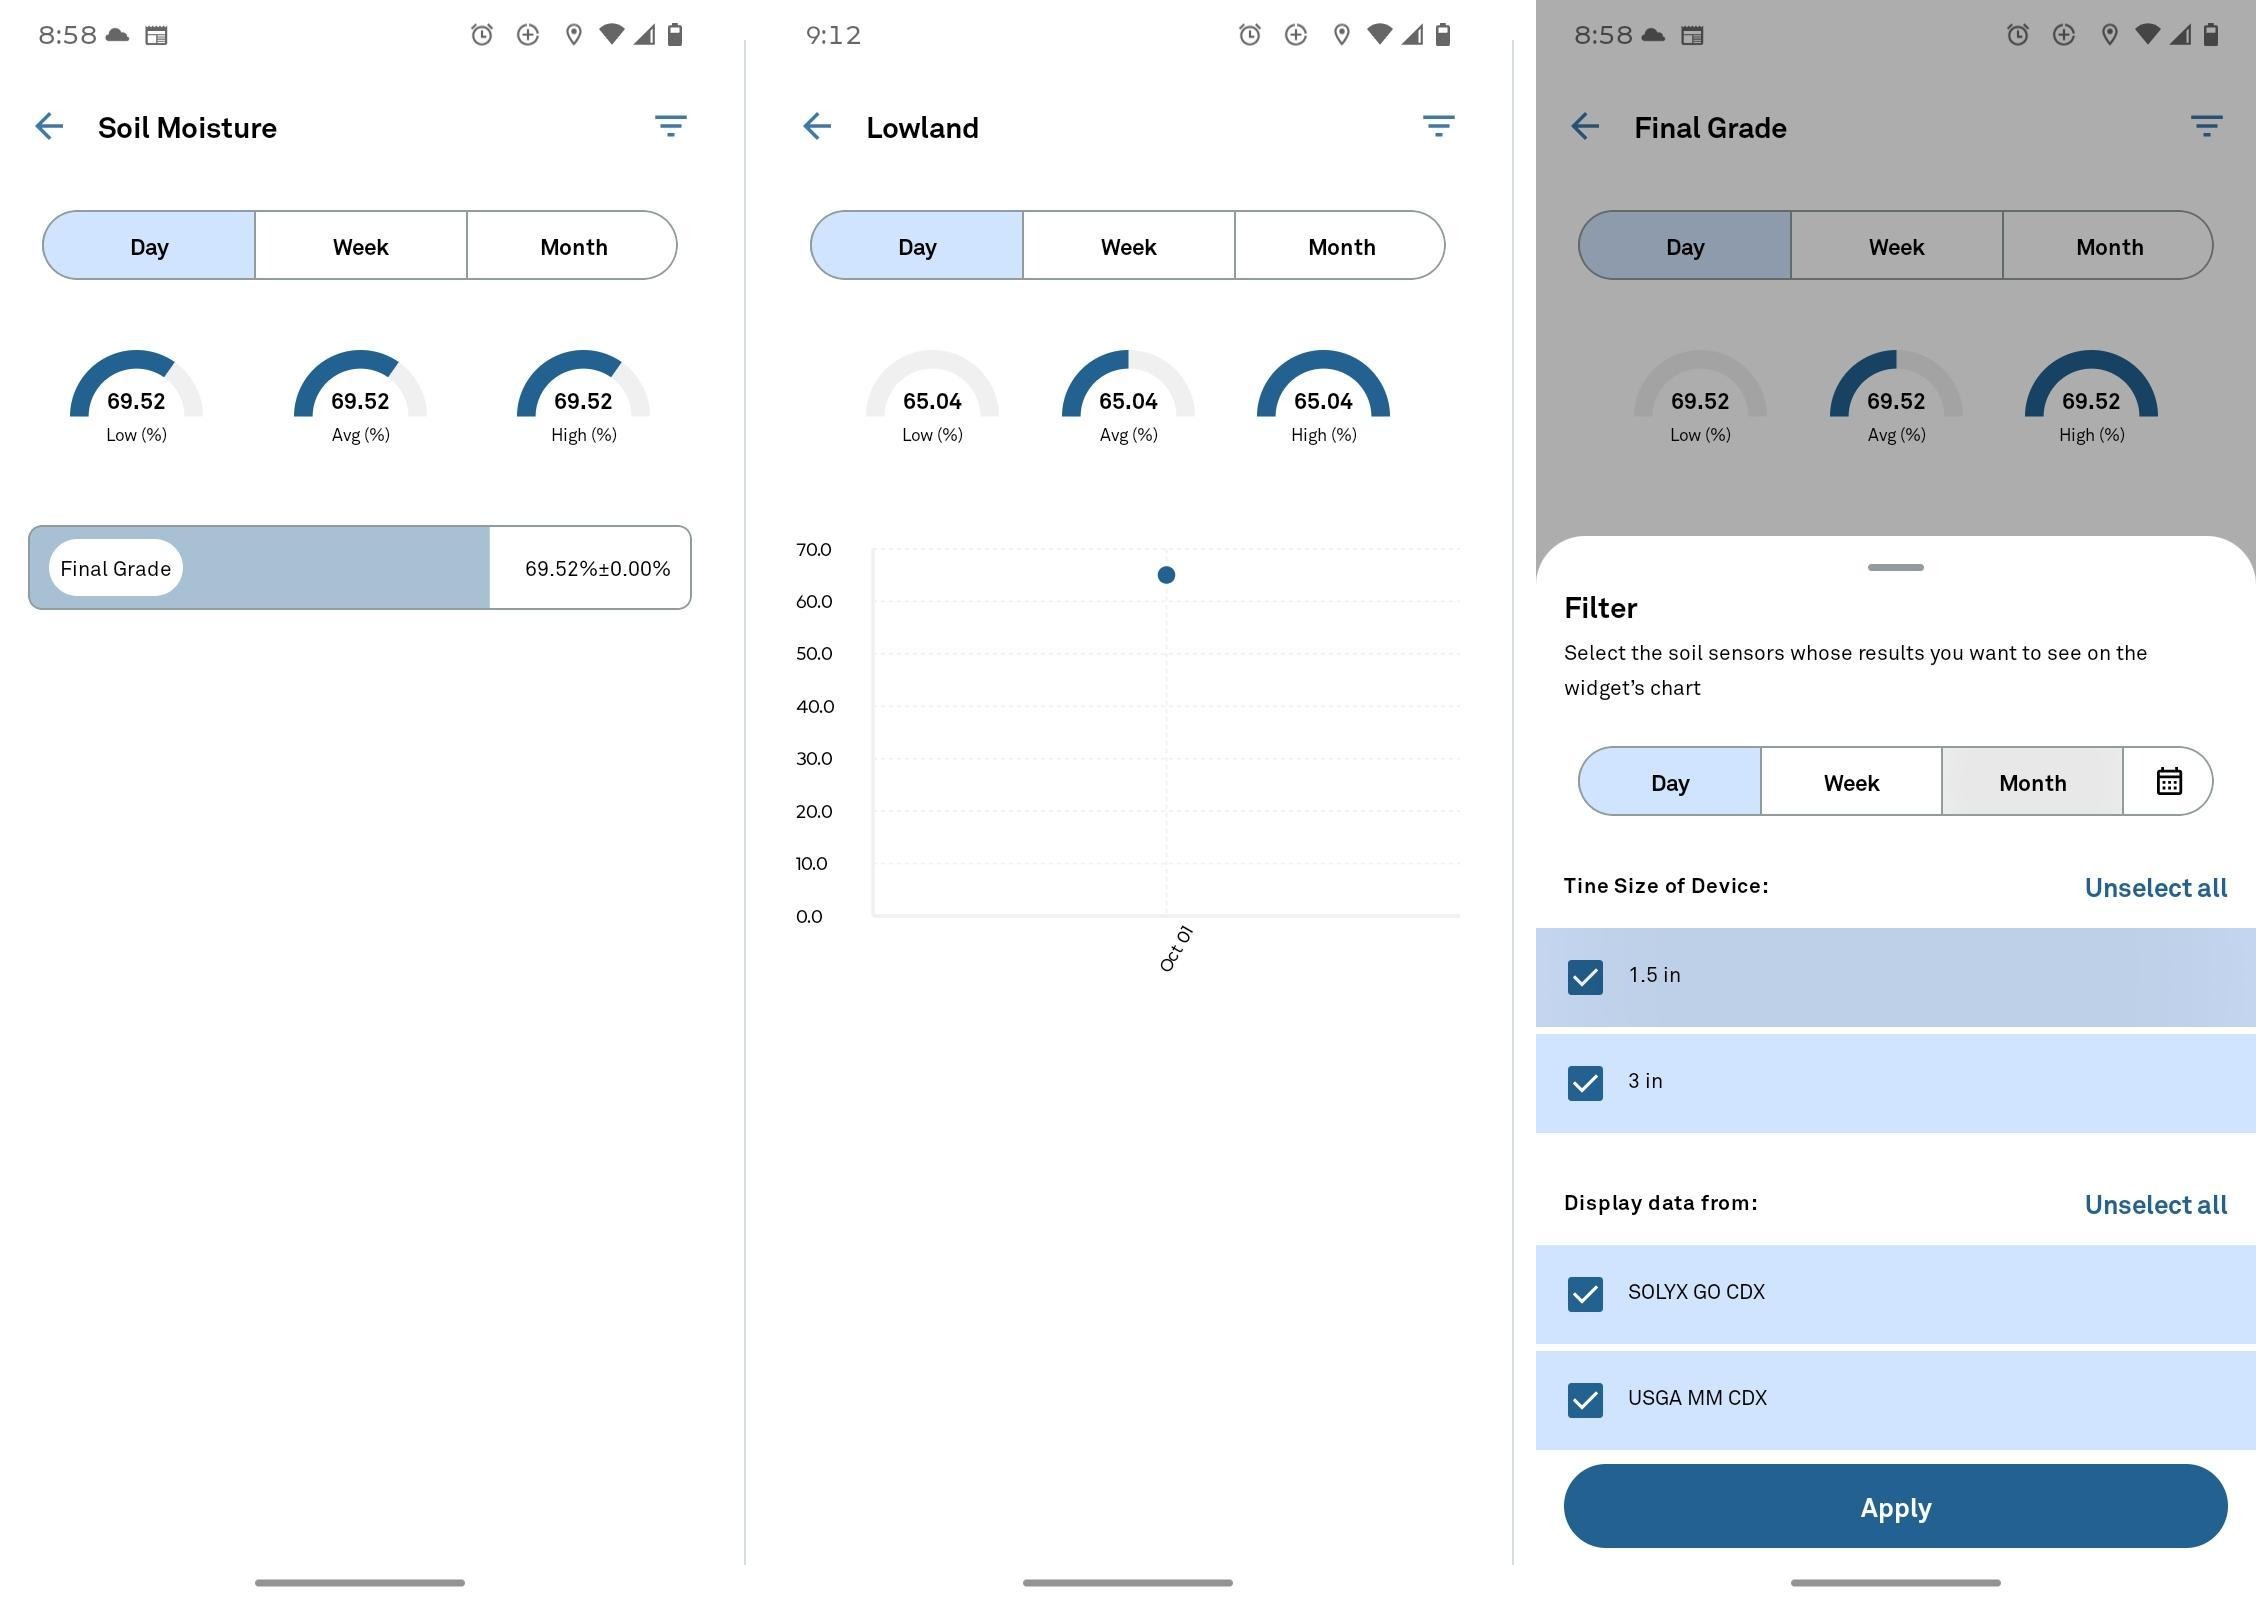
The Soil Metrics card on the Dashboard shows gauges for Moisture (%), Temperature (°F), and Salinity (dS/m).
Tap a gauge to see the Low, Avg, and High values for that measurement over a Day, Week, or Month, broken down by surface. Tap a surface to chart its readings over time.
To narrow the results, tap the filter icon in the upper right. In the Filter panel, you can:
- Choose Day, Week, or Month, or tap the calendar icon to pick a custom date range.
- Under Tine Size of Device, select 1.5 in, 3 in, or both. Readings from different tine lengths measure different soil depths, so filter to one size when comparing results.
- Under Display data from, select which devices to include.
Tap Apply to update the view.
Managing Your Device and Account
Tap More in the bottom navigation:
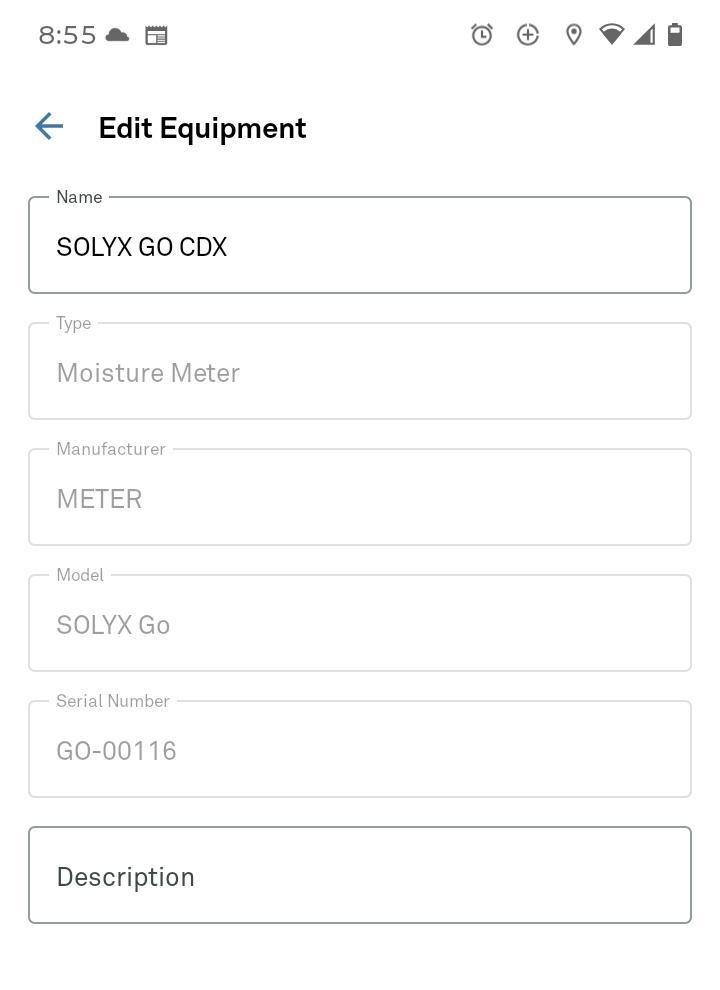
- Equipment — Change the display name of your SOLYX Go. Its type, manufacturer, model, and serial number are shown for reference and can't be edited.
- Profile — Log out of the app. To edit your contact information or change which organizations you can access, use ZENTRA Cloud.
Getting Accurate Readings
- Insert the needles fully and straight. Air gaps around the needles cause readings that are too low, or even slightly negative. Gaps form when a needle pushes a stone or root aside, or when the SOLYX Go goes in at an angle.
- Give temperature time to settle. Water content and EC are measured almost instantly, but the temperature sensor inside the needle needs to match the soil. For an accurate soil temperature, leave the SOLYX Go in the ground for 30 to 60 seconds before pressing an action button. The bigger the difference between air and soil temperature, the longer it takes.
- Be careful in rocky soil. Push gently and avoid forcing the needles past rocks, which can bend them.
- Don't measure frozen soil.
- Don't take measurements during active lightning.
- Keep the needles clean. Skin oils on the needles can affect EC readings in very salty soils. See the SOLYX Go user manual for cleaning steps.
Charging your phone from the SOLYX Go. The SOLYX Go can keep your phone charged in the field, but doing so drains its battery much faster. Without phone charging, the battery should last the season.
Troubleshooting
- The lights don't come on. Plug the SOLYX Go in and confirm it's charging.
- The SOLYX Go doesn't appear on the Device Connection screen. Confirm it's turned on and the Bluetooth light is blinking, then tap the Refresh icon. If it still doesn't appear, contact METER Customer Support.
- The app stays on Waiting For Measurement. Confirm the Bluetooth light is solid, which means the SOLYX Go is connected to the app. If it is connected and pressing an action button still doesn't take a reading, contact METER Customer Support.
- The SOLYX Go doesn't appear in ZENTRA Cloud. Confirm you were signed in to the correct organization in the app when you took your measurements. See Downloading SOLYX Go Data.
- Readings look too high or too low. See the troubleshooting section of the SOLYX Go user manual.
How did we do?
Downloading SOLYX Go Data