Table of Contents
Push API
How to enter and subscribe devices to an external server endpoint to receive the data.
Table of Contents
How to configure a Push API endpoint in ZENTRA Cloud, subscribe devices to it, and build a receiver that correctly handles the data ZENTRA Cloud sends.
Note: A permission level of Editor or higher is required to configure a Push API endpoint.
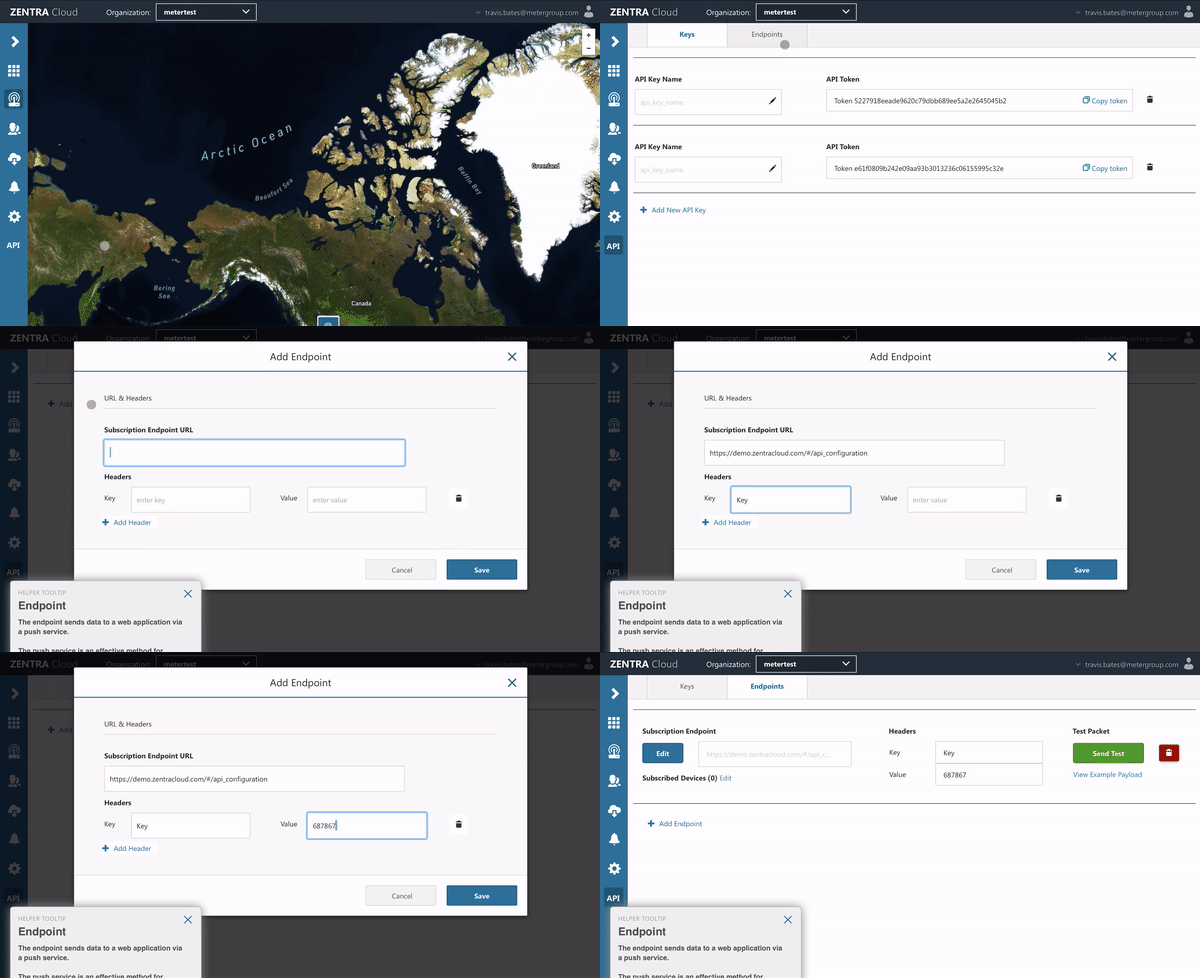
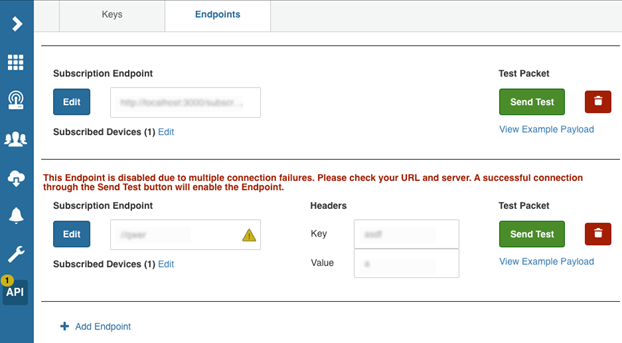
Enter endpoint
- Select API.
- Click the Endpoints tab.
- Click the + Add Endpoint button.
- Enter a URL. The URL must be prepended with
http://,https://, or//to be valid. - Enter a header key and header value. The header value cannot be empty.
- Click Save.
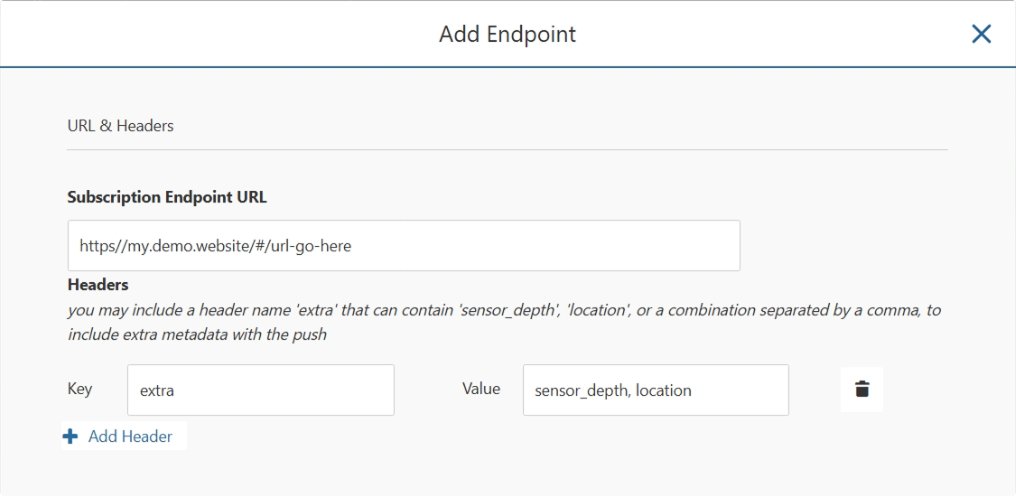
Optional header
To receive metadata such as sensor depth and/or latitude and longitude, add a header named extra and set the value to sensor_depth and location respectively. Use a comma to separate the values.
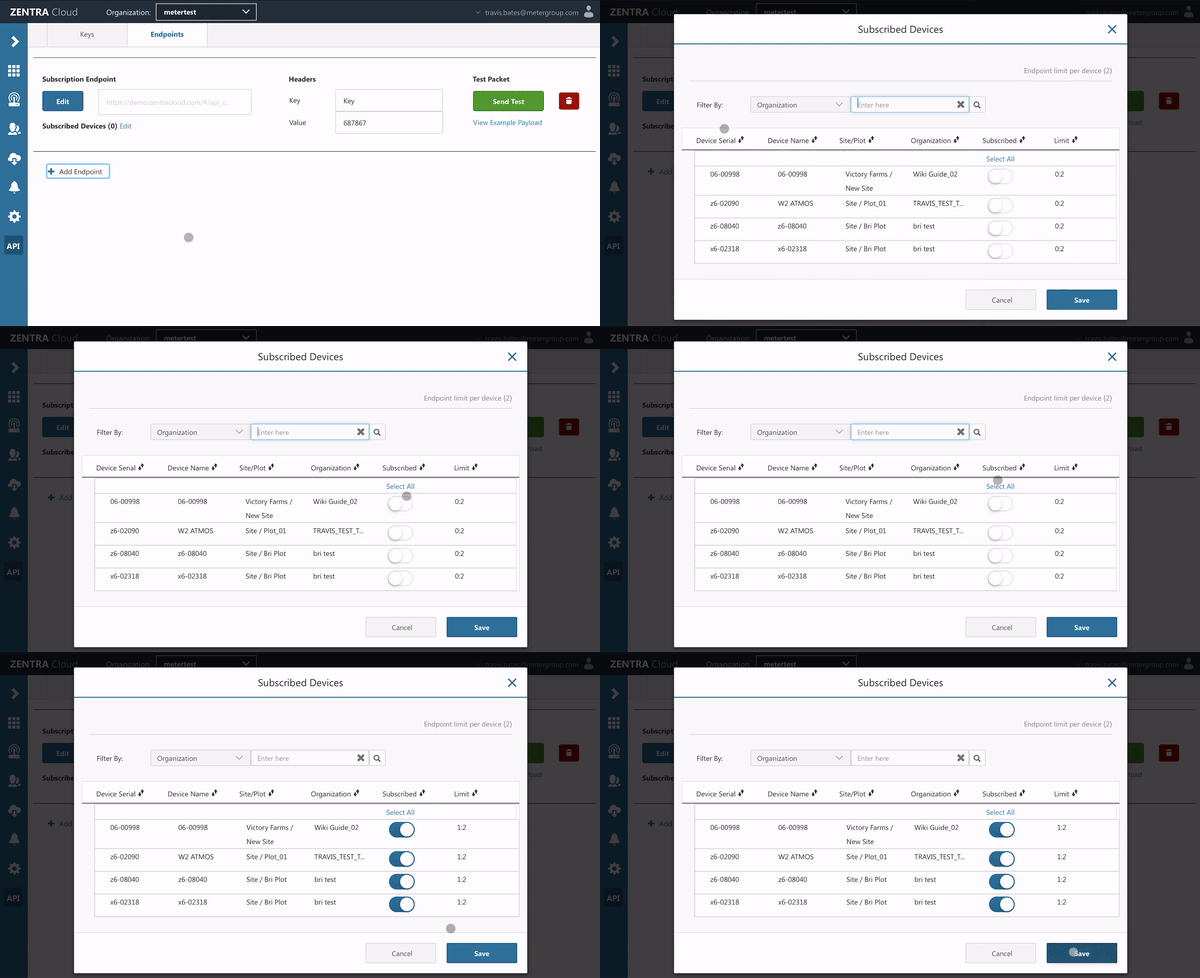
Subscribe devices
- Click the Edit button to the right of the number of Subscribed Devices.
- Select the desired device(s) by turning the toggle on (blue toggle).
- Click Save.
- Limit of two endpoints per device.
- Only the user who created the endpoint can edit the URL or the headers.
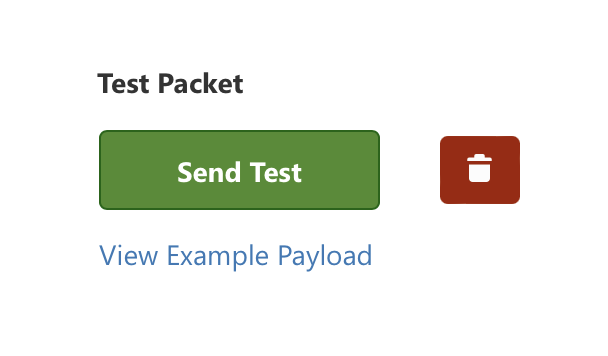
Test endpoint
Use the Test Packet controls to send a test packet or view an example payload. You must have at least one subscribed device.
Request format
When a subscribed device uploads new data, ZENTRA Cloud sends an HTTP POST to your endpoint URL with the content type:
Content-Type: application/x-www-form-urlencoded
Important: the body is form-urlencoded, not a JSON request body. Frameworks that auto-bind the raw body as JSON (for example, ASP.NET [FromBody], or reading request.json in Flask/FastAPI) will reject the request. Read the form fields instead.
To access the form fields in common frameworks:
- PHP —
$_POST - Python (FastAPI) —
request.form() - Python (Flask) —
request.form - Python (Django) —
request.POST - Node.js (Express) — enable
app.use(express.urlencoded());
Form fields
The POST body contains exactly two form fields:
Field | Description |
| The device serial number (plain string). |
| The full measurement payload as a JSON string (the same content shown in View Example Payload). Your endpoint must JSON-parse this field's value. |
Shape of the readings value
Once you URL-decode and JSON-parse the readings field, you get an object keyed by measurement name. Each measurement holds a list of sensor entries, and each entry has metadata plus a list of readings:
{
            "Air Temperature": [
              {
                "metadata": {
                  "device_sn": "z6-01234",
                  "device_name": "Field Station 1",
                  "port_number": 1,
                  "sensor_sn": "AT-56789",
                  "sensor_name": "ATMOS 41",
                  "units": "°C",
                  "errors": []
                },
                "readings": [
                  {
                    "timestamp_utc": 1720000000,
                    "datetime": "2026-07-11 12:00:00-06:00",
                    "tz_offset": -21600,
                    "value": 24.7,
                    "precision": 1,
                    "mrid": 1234567,
                    "error_flag": false,
                    "error_description": null
                  }
                ]
              }
            ]
          }
Example request
This is what ZENTRA Cloud sends (the readings value is JSON, URL-encoded into the field):
curl -X POST https://your-endpoint.example.com/webhook \
            --data-urlencode 'sn=z6-01234' \
            --data-urlencode 'readings={"Air Temperature":[{"metadata":{"device_sn":"z6-01234","port_number":1,"units":"°C","errors":[]},"readings":[{"timestamp_utc":1720000000,"value":24.7,"error_flag":false,"error_description":null}]}]}'
Receiver examples
ASP.NET / Azure Functions (C#) — read the form, then parse the readings value:
var form = await req.ReadFormAsync();
          string sn = form["sn"];
          string readingsJson = form["readings"];            // a JSON string
          using var doc = JsonDocument.Parse(readingsJson);  // now work with the parsed JSON
Flask (Python):
sn = request.form["sn"]
          readings = json.loads(request.form["readings"])
Express (Node.js) — with express.urlencoded() middleware enabled:
app.use(express.urlencoded({ extended: true }));
          // ...
          const sn = req.body.sn;
          const readings = JSON.parse(req.body.readings);
Endpoint health and auto-disable
Your endpoint should respond with HTTP 200 on success. Non-200 responses (or connection failures, such as the server being down or a typo in the URL) increment a failure counter. After 5 concurrent failures, the endpoint is automatically disabled and an email is sent to notify the endpoint's creator. A successful request via the Send Test button resets the counter and re-enables the endpoint.
How did we do?
TAHMO Server API
R Package